
Creating web applications using ASP.NET continues to get easier and easier. In no time at all, beginners can get set up with their first ASP.NET core application in Visual Studio and start iterating. In fact, I'd bet the download time of Visual Studio is the bottleneck! In this article, we'll look at how you can set up Visual Studio for ASP.NET Core and get iterating on your web applications!
Before we dive in, I just wanted to mention that if you're interested in Visual Studio Code, you can check out this article. These are both viable free options for developing ASP.NET Core applications, so you have some options!
Setting Up Your Development Environment
Starting with ASP.NET Core requires a few essential tools and software to get your development environment ready. Once set up, you'll be able to dive into creating your first application.
Before diving into the installation process, we'll ensure that you have the following software and tools:
- Visual Studio: This integrated development environment (IDE) from Microsoft is tailored for .NET development, offering a rich set of tools for building ASP.NET Core applications.
- .NET Core SDK: The Software Development Kit (SDK) provides all the necessary tools, libraries, and runtimes to build and run .NET Core applications.
Fortunately, the Visual Studio installer that we'll see in the next step makes much of this process a breeze!
Visual Studio Installation Guide
This section will walk us through installing Visual Studio and our dependencies. If you're interested in using Visual Studio Code instead, you'll want to check out this article.
- Download Visual Studio: Visit the official Visual Studio website and download the latest version of Visual Studio. For ASP.NET Core development, the Community edition is sufficient, and it's free.
- Install Visual Studio: Run the installer. During installation, you'll be prompted to select workloads. Ensure you select the ".NET Core cross-platform development" workload.
- Download and Install .NET Core SDK: While Visual Studio comes with .NET Core, it's good practice to have the latest SDK. Visit the .NET Core official download page and download the latest version of the .NET Core SDK. Follow the installation instructions specific to your operating system.
- Verify Installation: To ensure everything was set up correctly, open a command prompt or terminal and type
dotnet --version. This command should return the version number of the .NET Core SDK, confirming a successful installation.
Congrats! You have successfully installed Visual Studio!
Your First ASP.NET Core Web API
These steps will help you create your first ASP.NET Core Web API project in Visual Studio. A web API will only be the backend part of a web application. This can be useful if you're only focused on application server-side development, or if you plan on using a different tech stack separate from your front end.
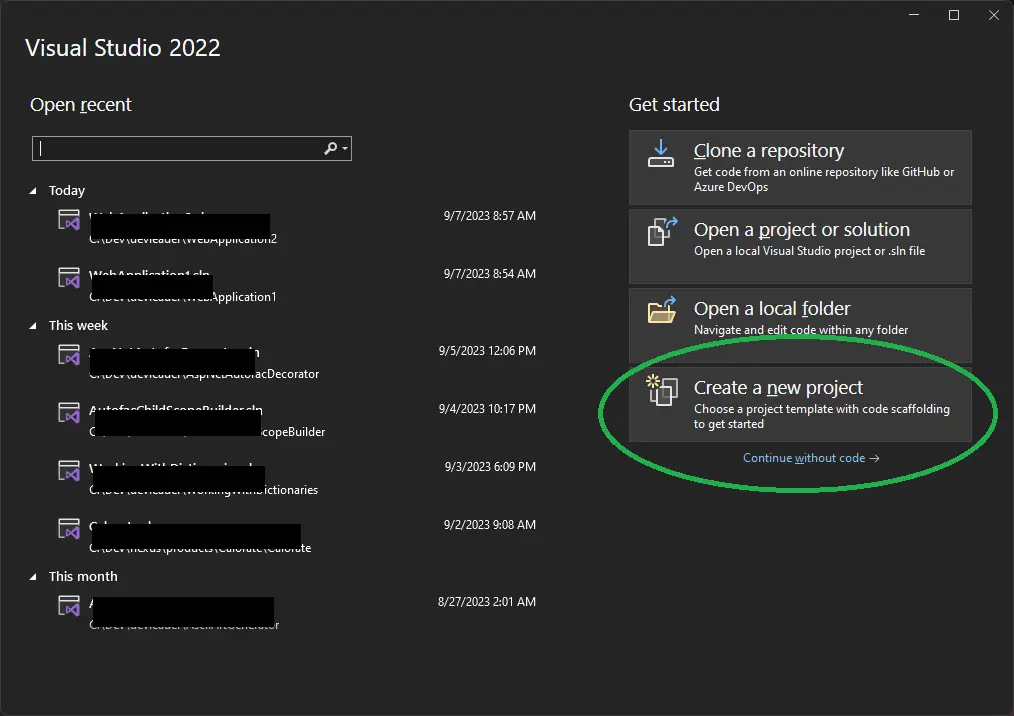
- Open Visual Studio: Launch the Visual Studio IDE on your computer.
- Create a New Project: Go to
File>New>Project, or click "Create a new project" directly on the startup screen if present.
- In the "Create a new project" dialog, search for "ASP.NET Core Web API" and select it.
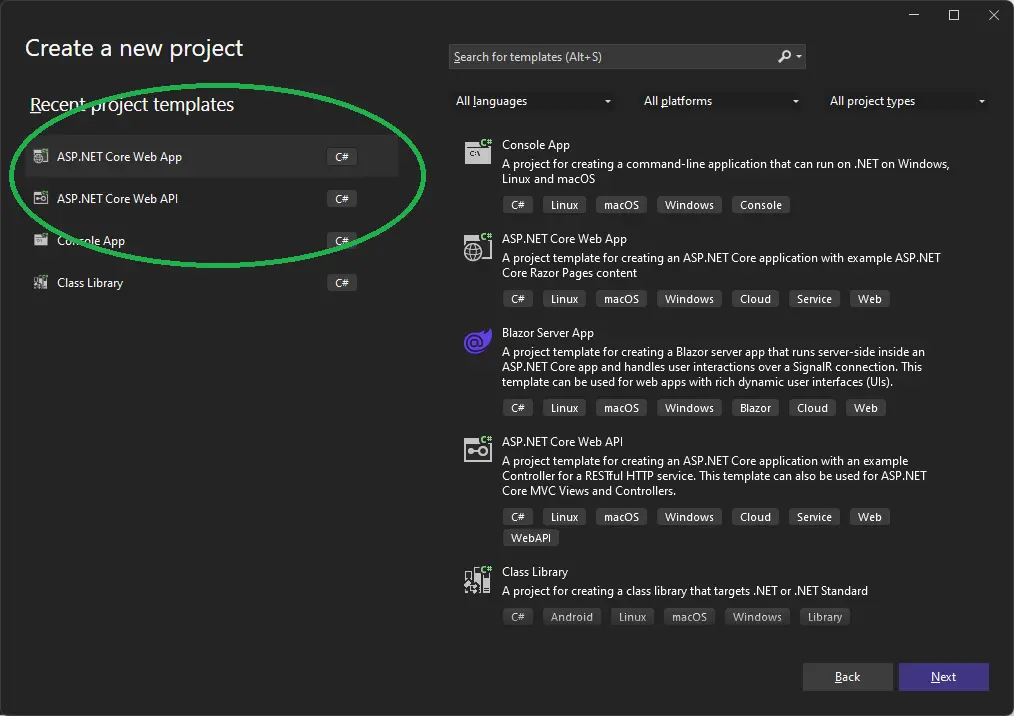
- Configure Your Project: Name your project, choose a location, and click "Create."
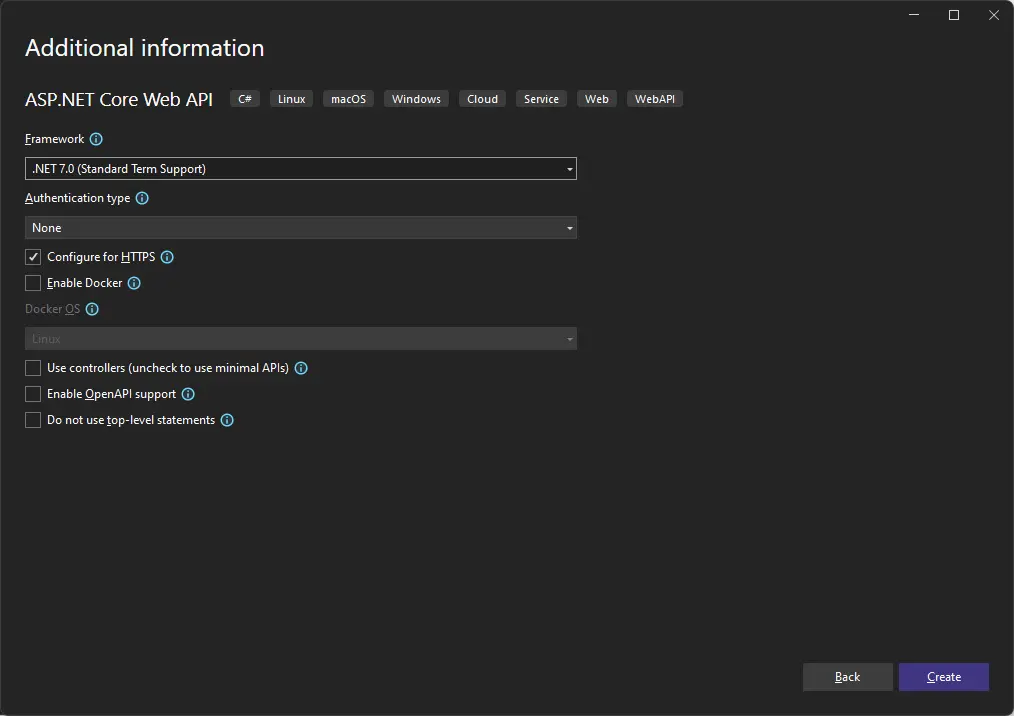
- Configuration Continued: In the next window, choose .NET 7.0 (or later if you're reading this in the future!). I would recommend leaving the default settings for the other options unless you feel comfortable changing them. You can always make changes later.
- Run the Application: After creating the project, press the run button at the top (it looks like a green play button) to build and run your application. A new browser window should open, displaying a default web page. It should have returned some text for hitting the weather URL
- Next Steps: From here, you can continue to play with modifying the weather routes or scrap them to create your own!
You can also check out this video for how to set up a minimal API project in under 5 minutes if you have Visual Studio installed!
Your First ASP.NET Core Web Application
These steps will help you create your first ASP.NET Core Web application project in Visual Studio. A web application will be both the backend and the frontend. By default, the project will be configured with Razor Pages so you can develop rich user interfaces with HTML and C# mixed together.
- Open Visual Studio: Launch the Visual Studio IDE on your computer.
- Create a New Project: Go to
File>New>Project, or click "Create a new project" directly on the startup screen if present.
- In the "Create a new project" dialog, search for "ASP.NET Core Web Application" and select it.
- Configure Your Project: Name your project, choose a location, and click "Create."
- Configuration Continued: In the next window, choose .NET 7.0 (or later if you're reading this in the future!). I would recommend leaving the default settings for the other options unless you feel comfortable changing them. You can always make changes later.
- Run the Application: After creating the project, press the play button at the top (it looks like a green play button) to build and run your application. A new browser window should open, displaying a default web page.
- Hello World: To customize this, go to the
Pagesfolder in the Solution Explorer, openIndex.cshtml, and replace the existing content with<h1>Hello World!</h1>. Save the file and refresh your browser to see the updated message.
Wrapping Up Installing Visual Studio for ASP.NET Core
At this point, you should be all done with getting set up to use Visual Studio for ASP.NET Core! In this article, we worked through the install steps and project creation steps to kick things off.
At this point, if you're looking for projects to try building then this article might serve as some inspiration! Of course, if you're interested more on the architectural side of things you could look at plugin-style architecture for ASP.NET core applications. That might be something for a little bit later if you're just starting out though!
Stay up to date with more software engineering and ASP.NET Core content by subscribing to the weekly newsletter. Every week I'll be sharing content to help you along your journey in software engineering and working with dotnet!